Model
- Sketch and Extrude
- Body, Cylinder, Freeform, Offset Form
- Combine and Split – by plane or sketch line
- Open STEP assemblies or merge them
 YuvaForm
Beta · Fixture software for 3D printing
YuvaForm turns your STL or STEP model into a print-ready fixture. Guided, with templates – and editable at any time.
01 — From geometry to fixture
STL or STEP. The geometry you already have is the starting point.
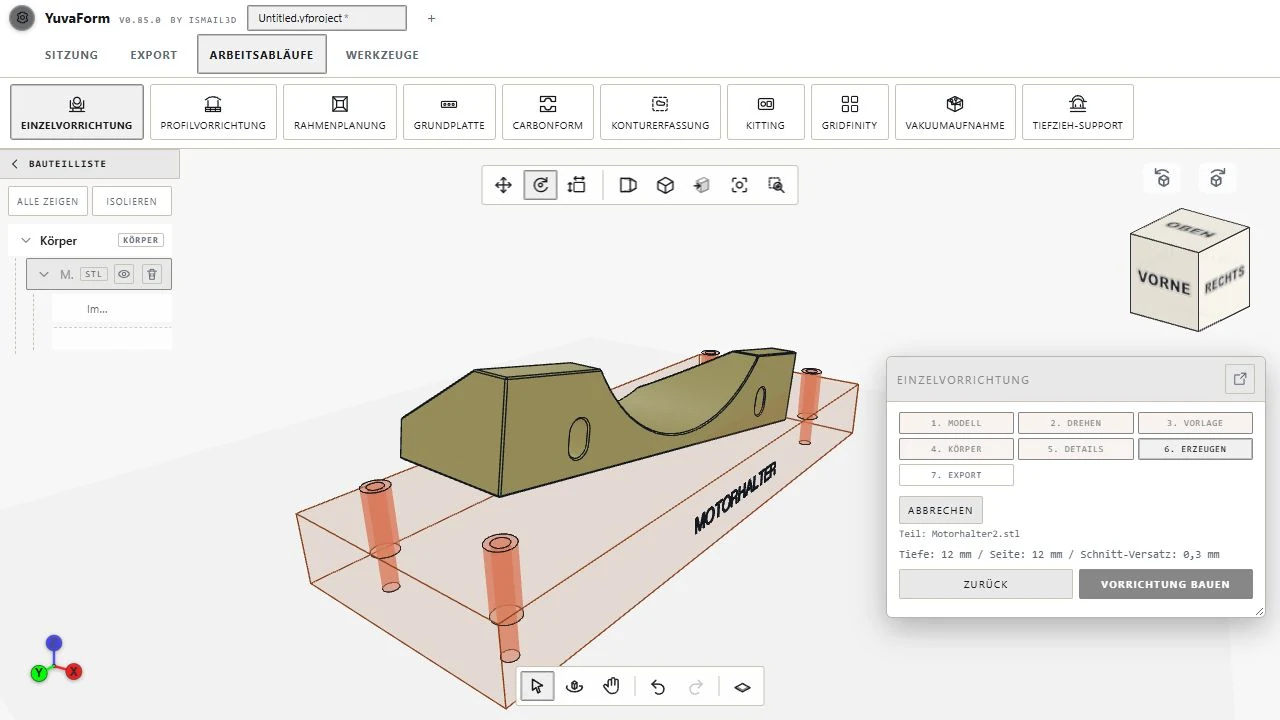
Follows the contour – with 0.3 mm clearance and an insert chamfer.
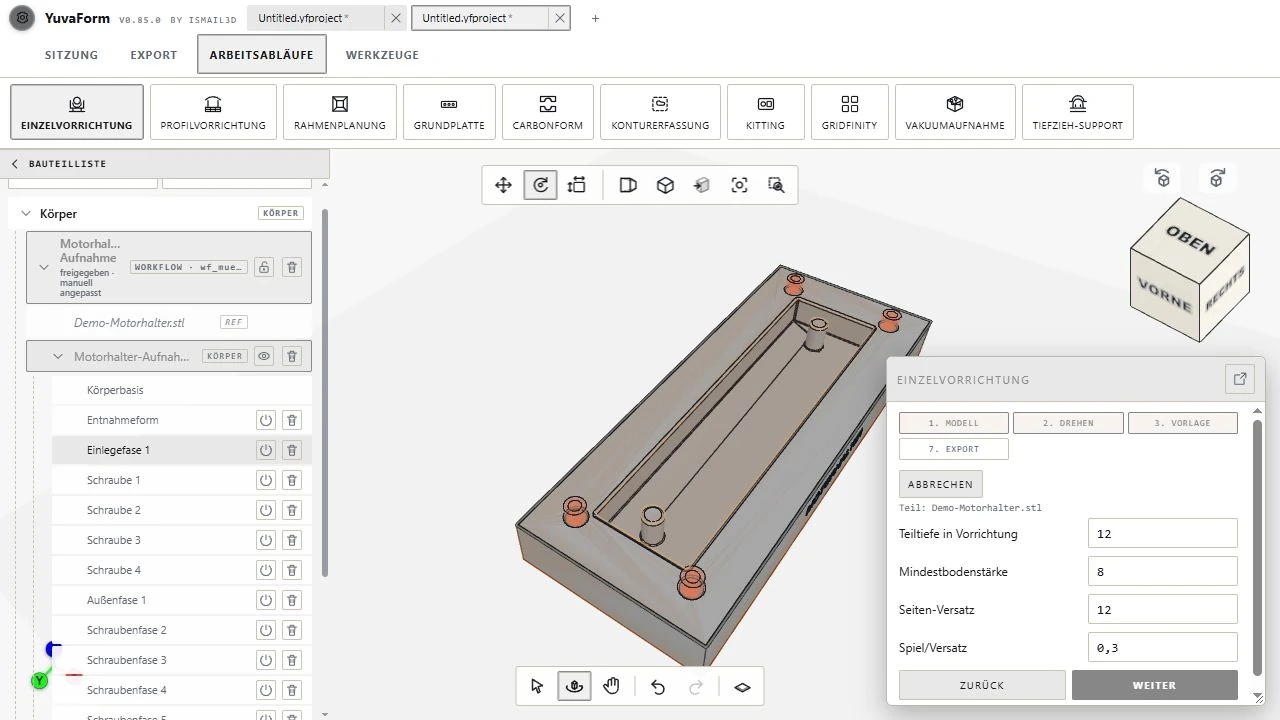
12 mm deep, 8 mm floor. Both fully adjustable.
4 × M4 with chamfer, size and head style of your choice.
Right on the body. No mix-ups at the workstation.
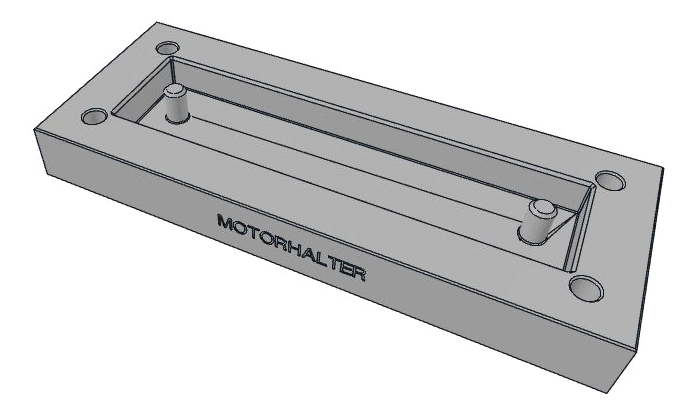
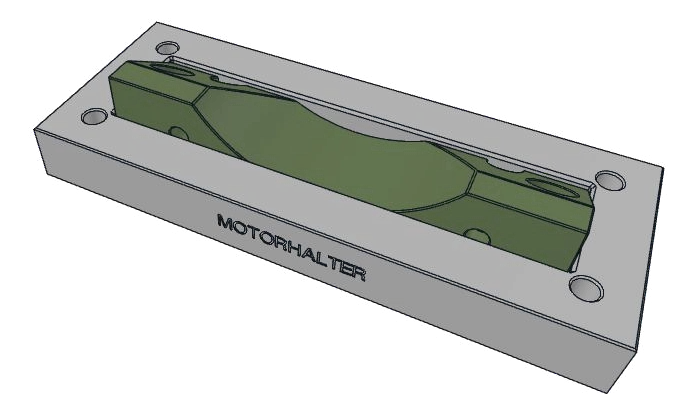
With partOriginal geometry from YuvaForm
02 — The steps
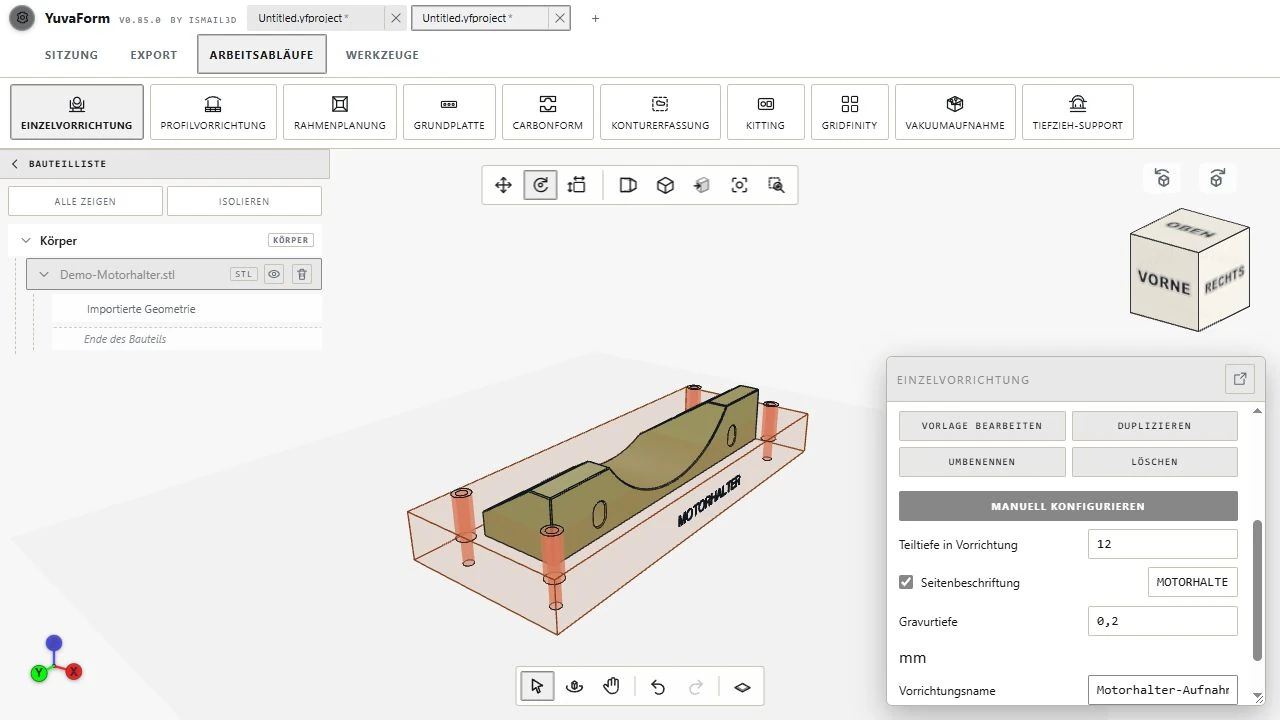
Open and align an STL or STEP file. From now on, the part is the reference for everything that follows.
A saved template sets depth, side offset and clearance. The preview shows the fixture before it is built.
Every step stays editable in the Browser. Then export as STL or STEP – or send it straight to your slicer.
03 — All in one interface
The fixture straight from your part: cavity cut, screw points, label.
Precisely placed supports, extended down to a shared ground plane if you like.
Profile and tube frames with validated variants, diagonal braces and a bill of materials as CSV.
Joins bodies with a baseplate – freeform outline, cutouts, inserts and splitting.
Two print-optimized mold halves from an editable parting line, with locators and fasteners.
Take a photo of your tools, get the contour – locally, even when tools cross each other.
Dimensionally accurate container inlays for production and order picking.
Baseplates and tool modules on the 42 mm grid, as a workflow of their own.
Hole fields, channels, connectors (M5, G1/8, G1/4) and seal grooves straight from the cavity.
Distributes vents and connects them through an adjustable channel system.
04 — The rest of the toolbox
Around them sits a complete toolkit for fixture design: model, equip, check, repair, output. All parametric in the Browser – and all editable.
05 — Your data
YuvaForm runs as a proper application on your computer – not in a browser on someone else’s server.
Parts, fixtures and sessions only leave your computer when you export them.
Licenses and updates arrive as signed files. No always-on connection, no mandatory account.
06 — Built-in training
A guide points to the next target. You click, YuvaForm checks the step and unlocks the next one. On a bundled sample part – no CAD experience needed. Reading manuals is so last season.
Built by Ismail – independent, with about ten years of additive manufacturing and eight years of CAD. The focus is on FDM, fixtures and how they actually get used on the shop floor.
Ismail3D · Bad Schönborn, Germany
07 — Questions
No. Guided workflows, templates and the built-in training get you there. If you do know CAD: even faster – every feature stays editable in the Browser.
STL and STEP, including multi-part STEP assemblies. Whether a geometry suits the fixture you have in mind depends on the part and the job – when in doubt, we’ll try it with your part.
Yes. Every step ends up in the Browser. Values and positions can be changed afterwards, and individual features can be suppressed.
As STL or STEP – or in one click straight to your slicer. You do the print preparation there, just like you’re used to.
On your computer. YuvaForm is a desktop app and works locally. Nothing is uploaded to a cloud.
Yes. The interface, training and messages are available in English and German, and you can switch the language in the settings at any time.
YuvaForm is in beta and aimed at businesses. There is no public download yet. Request a demo or beta access – we’ll sort out license and terms with you personally.
Beta · for businesses
Free of charge after a quick chat: you get a sample fixture for your own part – and see in black and white what YuvaForm can do for your production.
We’ll agree on how to exchange files personally. Please don’t send any models through the form yet.
info@yuvaform.de